Cool
Transparent Text Effect in Photoshop® Part One
This tutorial shows you how to create the following
effect in Adobe® Photoshop:
Notice that the text is defined by a black shaded area
in the upper left of the text and a white shaded area
in the lower right of the text. It gives an embossed
look as if light is being cast from below and to the
right.
This example uses a 72 ppi image with 60 point type.
Accordingly, should you decide to use a higher resolution
image or greater point size type you will need to adjust
some of the specs. In that case I'll call out notes
where applicable.
Although I used Photoshop version 5.5 for this example,
both version 5.0 and 5.5 support editable text layers
(text that you can change). You could do the tutorial
with version 4.0, but the text won't be editable once
you create it because it will be rasterized (made into
pixels).
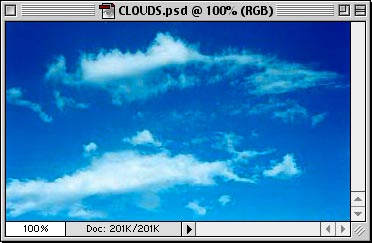
1. In this example I chose a sky image because I thought
it was fitting for the effect. Load it up into Photoshop
by clicking File > Open.
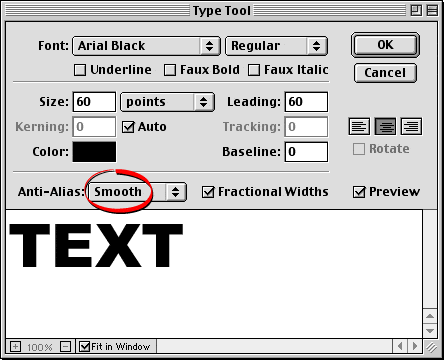
2. Click anywhere on the image with the Type Tool
. In the dialog, pick an appropriate bold or black font
and point size. I used 60 point Arial Black in this
example. Choose "Smooth" for the Anti-Alias
setting (circled below).
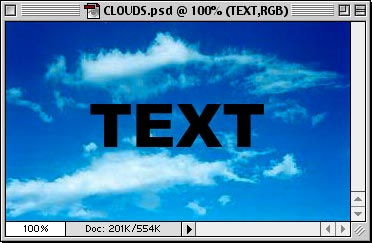
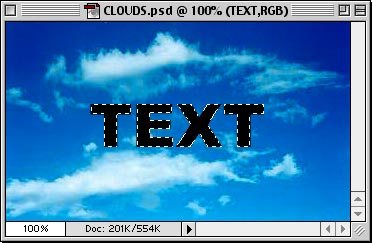
3. This is what your image should look like after creating
the text. Don't worry, Photoshop creates the text on
a new layer so it won't affect the pixels of the background
image.
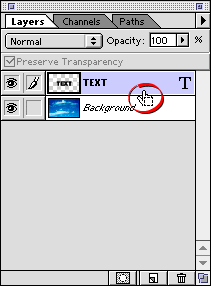
4. In the Layers palette Cmd + Click (Mac®)
/ Ctrl + Click (Windows®)
the new layer. This will create a selection in the shape
of the text. You will see the hand pointer with a square
marquee when you hold down the modifier key (Cmd or
Ctrl) over the layer when you click.
5. This is what the image will look like with a selection
in the shape of the text. The selection will be defined
by its "marching ants" marquee.
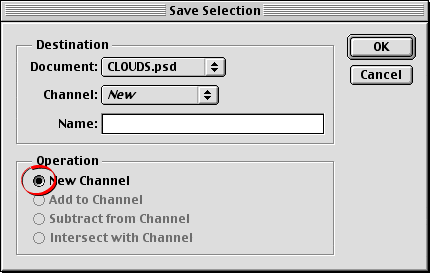
6. Next click Select > Save Selection....
In the dialog, just accept the defaults. When you click
"OK" Photoshop will save the selection as
a new channel (circled).