|
|
Quick
and Easy Gel Buttons in Canvas™ 7
Part Three |
 |
|
|
|
|
|
|
12. You could use this vector version
of the button in the Web Buttons palette, but I prefer
to use paint objects (images). I have purposely left
the button un-grouped to make it easier to select its
parts to make color changes. Marquee-select the button
to select all of its objects.
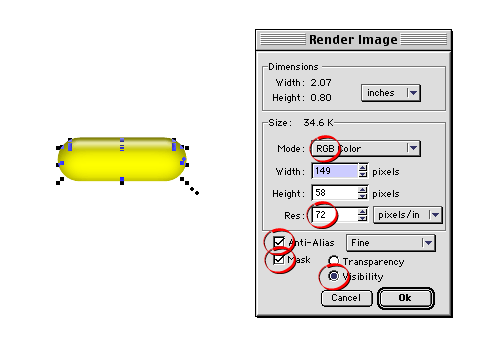
13. Next click Image > Area >
Render. You will see the "Render Image"
dialog. Choose RGB for the "Mode" with a resolution
of 72 pixels per inch (ppi) with fine anti-aliasing
and a visibility mask. Use the settings shown circled
below and click "OK" when done. Screen images
are prepared using RGB color at 72 ppi. The visibility
mask gives it a transparent background and the anti-aliasing
will give it a smooth edge.
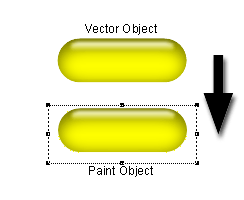
14. This will create a new paint object
directly on top of the vector original. Drag it off
the vector group so you can work on it by itself.
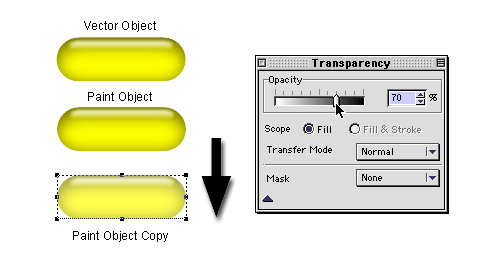
15. Trim away all excess pixels in this
paint object with the Crop tool (click
here for more details). Then click on it and Opt-drag
(Macintosh®) or Alt-drag (Windows®)
away from it to create a copy of the paint object. Be
sure to release the mouse button before releasing the
Opt/Alt key. Alternately you can use Edit > Copy
followed by Edit > Paste. Bring up the Transparency
palette and set the opacity of this copy to 70%.
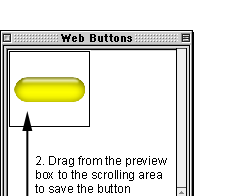
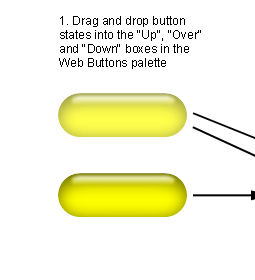
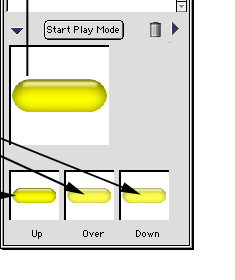
16. Double-click the Web Button tool in
the Toolbox to bring up the Web Button palette. Drag
and drop the paint objects into their respective "Up",
"Over" and "Down" boxes in the palette
as shown in the example below. You will then see the
button in the preview box in the middle of the palette
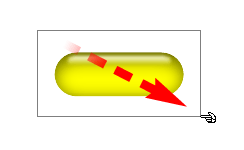
which you can test with the mouse. When you are satisfied
with the results, drag the button from the preview box
into the scrolling area at the top of the palette to
save the button. For more details on how to place web
buttons into Canvas documents click
here.
Click
Here To Continue...
|