|
|
FreeHand®
Drawing Technique No. 3
Part B |
 |
|
|
|
|
|
|
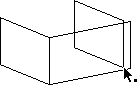
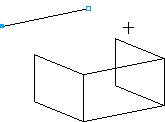
10. As shown in a previous step, position
the mouse pointer over the corner point of this rectangle
(below left), then drag it to the right until it snaps
to the corner point of the first rectangle (below right).
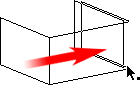
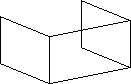
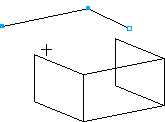
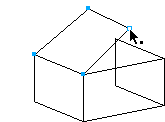
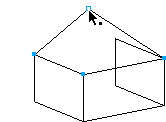
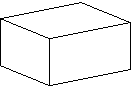
11. You now have a three-sided box as
shown below. The purpose of the last rectangle was to
provide points to snap to the top which we will be making
in the following steps.
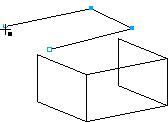
12. Select either the Pen tool or the
Bezigon tool in the Toolbox.

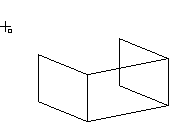
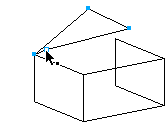
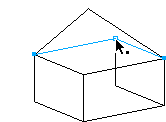
13. Create a four-sided object just above
the rectangles as in the following illustrations. The
size, shape and position of the object is not important.
Click...
 |
Click...
 |
Click...
 |
Click...
 |
Look for the pointer with the solid
square...
 |
Click to close the object
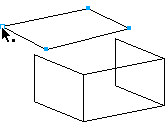 |
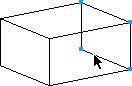
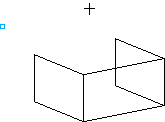
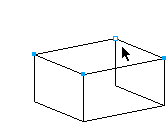
14. Next snap the corner points of this
new object to the four corners of the three-sided box
below. The first point is already selected. A selected
point appears as a hollow square. Start by snapping
this point to the upper left corner of the leftmost
rectangle then select and snap each of the remaining
points in turn...
Snap to point
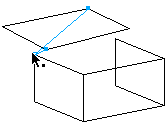 |
Click and release to select point...
 |
Snap to point
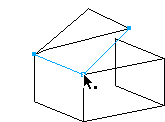 |
Click and release to select point...
 |
Snap to point
 |
Click and release to select point...
 |
Snap to point
 |
Done...
 |
15. Now select the far right rectangle
and send it to the back of the stack by clicking Modify
> Arrange > Send To Back. Depending on your
preference, you can either delete this rectangle by
pressing the Backspace or Delete key (below right),
or you can do the following steps...
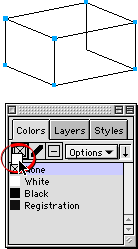
16. Marquee-select the top, left and center
objects. FreeHand 9 allows the Pointer tool to be contact-sensitive
so the objects don't have to be completely surrounded
by the marquee.
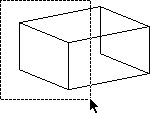
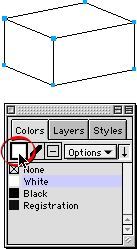
17. Bring up the Color List and drag the
color chip of your choice over the fill selector. In
this case I chose white. All three objects will get
a white fill thereby obscuring the rectangle at the
bottom of the stack.
18. The finished box is shown below.
|