Separating
Mask From Bitmap In Illustrator® or FreeHand®
Example using Adobe® Illustrator 8:
1. Open the previously exported PDF file into Adobe
Illustrator.
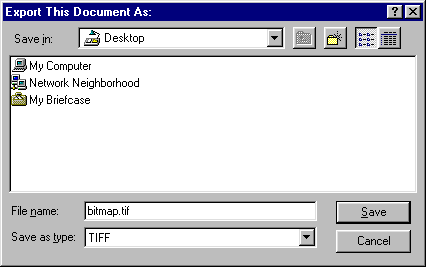
2. Click File > Export > TIFF. Enter a
filename and click "Save".
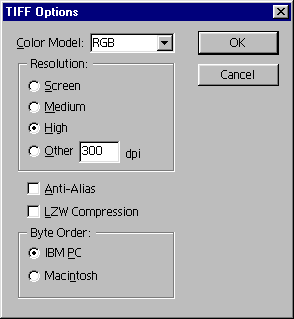
3. Enter the TIFF Options...then click "OK".
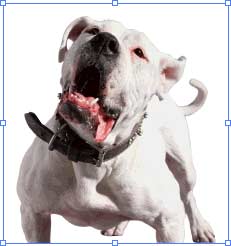
4. Select the bitmap object. Make sure only the bitmap
is selected. You can tell because neither the points
nor the outline of the mask will be highlighted. Press
the "Delete" key. This will get rid of the
bitmap.
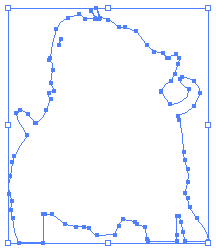
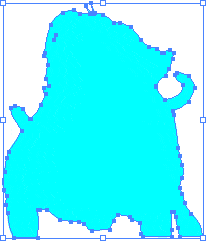
5. Now select the mask object.
6. Click the Fill Box in the Tool Palette, then click
any color swatch in the Swatches Palette to assign a
fill (other than none) to the mask object.
Note: CorelDRAW® has difficulty
importing an EPS file containing an object with a stroke
of none and a fill of none. Once this object is imported
into CorelDRAW it is an easy matter to assign it a fill
of none.
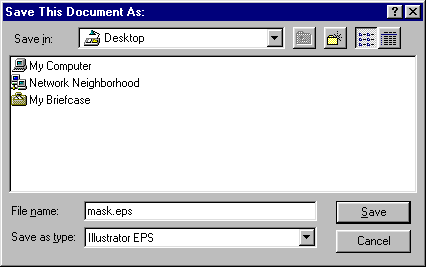
7. Click File > Save > Illustrator EPS.
Enter a filename and click "Save".
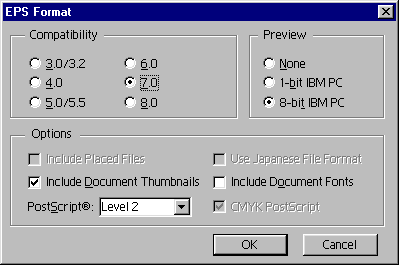
8. Choose version 7.0 as the compatibility, then click
"OK". You will get a warning that you are
not saving in version 8.0 and some of the features may
not read back in. Click "OK" when you see
it. The maximum version of Adobe Illustrator that CorelDRAW
8 can import is version 7.0 at this time.