Photo Retouching with Photoshop®
Levels Adjustment - Part 2B
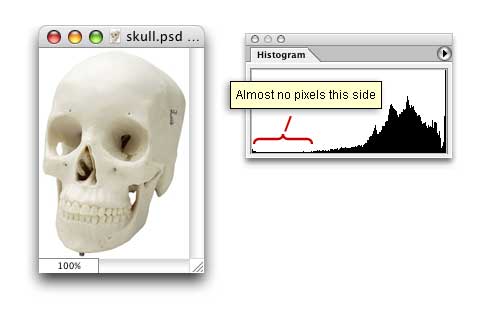
4. In this next example. we will be making the opposite
adjustment. The image is slightly underexposed...but
not much. Please note that in the histogram, there
are almost no pixels in the left side of the graph.
Just like the previous
example, add an Adjustment
Layer to make the Levels Adjustment. Click Layer > New
Adjustment Layer (or Layer > New > Adjustment
Layer for older versions of Photoshop). Accept
the default name it gives you and click the "OK" button.
5. Below is a Flash Video showing you how
to make the Levels adjustment.
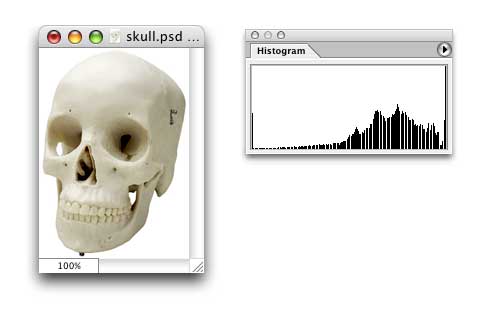
The small black triangle on
the left side of the histogram is dragged towards the
center of the graph. Like the previous
example,
when you drag the triangle to the right that the gray
triangle in the center moves a proportional distance
towards the right as well. After you have made the
adjustment, click the "OK" button.
6. The result is an image with a little more contrast.
As in the previous
example, you can see the redistribution
of pixels in the histogram.
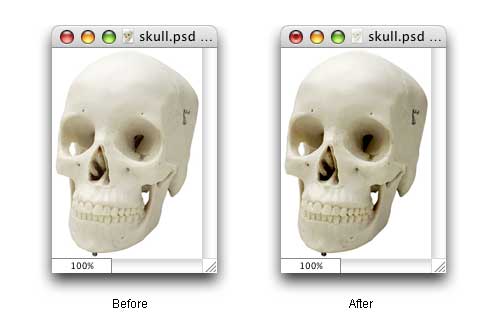
7. Below you can see the before and after shots of
the image. The Photoshop Levels Adjustment adds just
a little bit more contrast. You can see more detail
in the lighter parts of the image than you could before
the Levels Adjustment was made.