|
|
Creating
Stroked Text In QuarkXPress™
Part Two |
 |
|
|
|
|
|
|
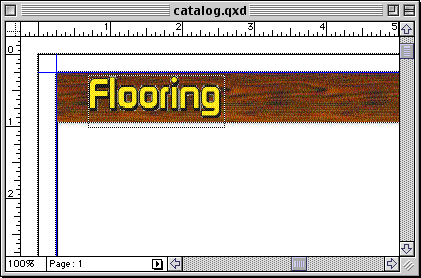
5. Position the image in the layout. In this case it's
a page head.
 |
|
Note: When
working on the Macintosh®, the preview image
in the EPS file will be in PICT format. The PICT
format supports transparency so the picture box
can be set with a background of "None"
and you will be able to see the transparent background
onscreen in QuarkXPress. When working in Windows®,
though, the preview image will be in TIFF format
which doesn't support transparency. Although you
won't be able to see a transparent background onscreen,
it will print correctly when output to a PostScript®
device. |
Using QuarkXPress To Create The Effect
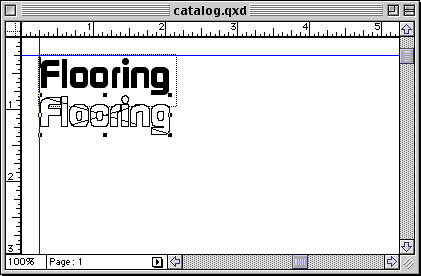
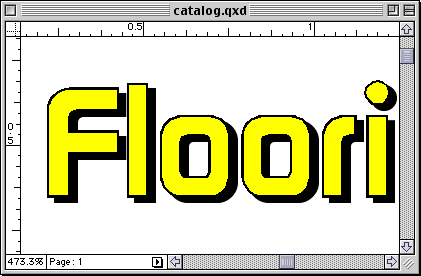
6. In QuarkXPress, create a text box and enter the
desired text, then select it (shown highlighted below).

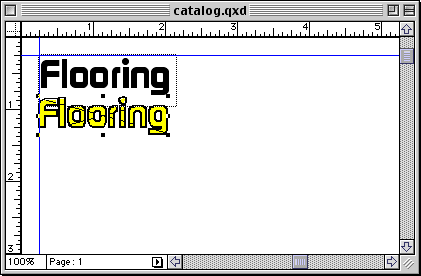
7. Click Style > Text to Box. This creates
a picture box in the shape of the text. Click Item
> Edit, then un-check "Shape" to keep
from accidentally changing the shape.
8. Click Item > Modify, then in the "Box"
tab, choose a color from the "Box" section
of the dialog (for the fill). Then click the "Frame"
tab and select a width and color for the frame of the
box (for the stroke). In this case the box (fill) color
is yellow and the frame (stroke) color is black with
a width of .6 of a point.
9. Click Item > Content > None to get
rid of the criss-cross lines in the box. This is optional
but the criss-cross lines tell you that the box is a
picture box. I prefer to get rid of them. To achieve
the same shadow effect, move the box over the original
text. Then select them both with the Item tool and group
them by clicking Item > Group.
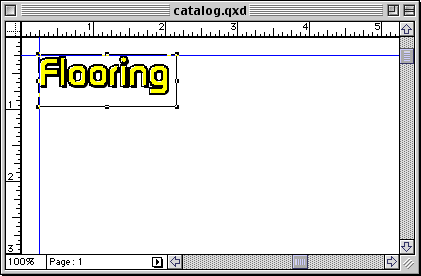
10. This is a close up of the finished effect. Once
again, you may want to create the effect in another
application and save it as an EPS file because you will
have greater control. Still, you can create the effect
in Quark™ without having to use another application.
|