|
|
Photo Retouching with Photoshop®
Levels Adjustment - Part 1A |
 |
|
|
|
|
|
|
This tutorial is about one aspect of photo retouching in Photoshop - using the Levels Adjustment to correct tonal values. The Levels Adjustment function in Photoshop can be used in a variety of ways. This tutorial explores just one way.
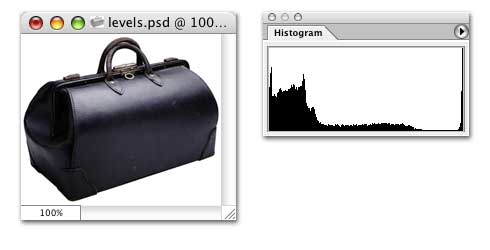
1. In the photo of the black bag below, the exposure looks pretty good at a glance, but because the color of this object is primarily black, it requires a little tweaking to reveal some of the detail. The Levels Adjustment will bring out the detail which is buried under the dark areas where it is difficult to see. On the right is a histogram of the image. In this tutorial, I am using Adobe® Photoshop CS. In this version the Histogram Palette is grouped with the Info and Navigator Palettes by default. The histogram is a graphic representation of the distribution of light and dark pixels. The horizontal axis represents the "darkness" of the pixels in the image - going from the darkest pixels on the left to the lightest pixels on the right. The vertical axis represents the number of pixels for each shade with the smallest number of pixels on the bottom to the largest number of pixels at the top. Please note the large clump of pixels on the left end of the histogram. This is an indication that this is a dark photo.
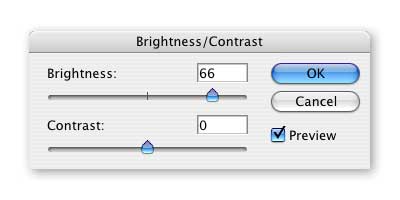
2. Now, if you had to lighten this image for print or for a web page, you may have a tendency to go straight for the "Brightness and Contrast" adjustment. Generally I will save Brightness and Contrast as my last adjustment - but not always. If you try to use Brightness and Contrast all by itself to do the job you will probably be disappointed in the results. Here's why... Go ahead and click Image > Adjustments > Brightness and Contrast (or Image > Adjust > Brightness and Contrast with older versions of Photoshop). Check the "Preview" checkbox and drag the Brightness slider to the right to lighten the image.
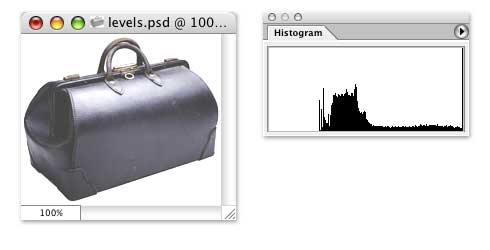
3. Now take a look at the result. You can see some more detail but the image is overexposed. It looks "washed out". Also, please note the histogram with the telltale blank area on the left side where there are no pixels represented in the dark end of the graph. This is a sure sign of an underexposed image. There were two mistakes here. Using Brightness and Contrast was only one of the mistakes. The other was using the Image > Adjustments command. You see, that command will permanently alter the pixels. Once you save and close the file, the data is gone and you can't get it back unless you have a backup copy of the image. Don't feel bad if you have done this. I messed up a whole bunch of images like this when I first began to do image editing.
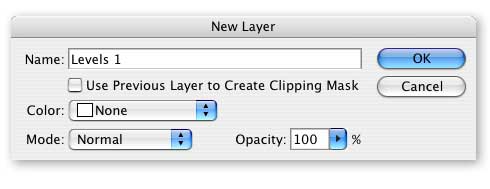
4. Okay, let's re-open the file or click Edit > Undo, or File > Revert ... whatever it takes to get back the original image and this time we will use an Adjustment Layer. This will place a layer over the original pixels where we can make our adjustments. When we view the image we look down through this layer as if the adjustments were done to the pixels themselves. The difference is we can turn the visibility of the adjustment layer off so we don't see its effect on the pixels below it or we can throw the layer away and the pixels in the image will remain untouched. As a rule, I will always use an adjustment layer to preserve the original pixels in the image just in case I make a mistake. Click Layer > New Adjustment Layer (or Layer > New > Adjustment Layer for older versions of Photoshop). Give the layer a name or accept the default name it gives you and click the "OK" button.
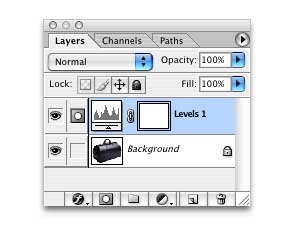
5. You will see the Levels dialog box and you will also see a change in the Layers Palette. You can see the new adjustment layer over the image Background Layer (or regular Layer name if it isn't the Background Layer).
Click
Here To Continue...
|