|
|
A
Rainbow of Illustrator® 9 Gel Buttons
Part 1D |
 |
|
|
|
|
|
|
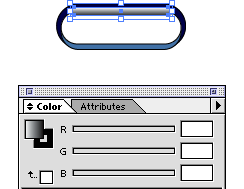
27. Next, select the top object ("Object
4"). Bring up the Gradient palette and choose "Linear"
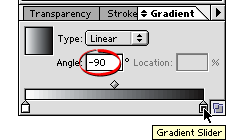
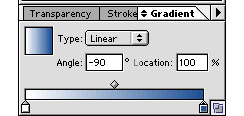
from the "Type" drop-down. Enter minus 90
degrees in the "Angle" box, then click the
right color slider (labeled "Gradient Slider"
below).
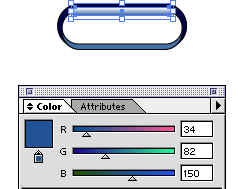
28. From the Color palette options menu,
select "RGB" to bring up the RGB color sliders.
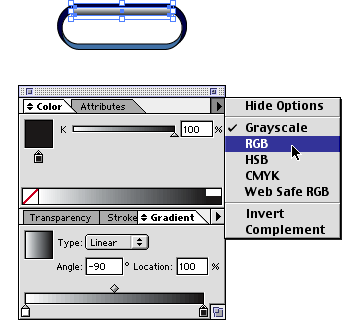
29. Then enter RGB values of 34, 82 and
150 respectively. We will call this "color 2"
or the "second color" of the gradient for
this object. We want to identify this color because
we will change it later to create the different color
buttons.
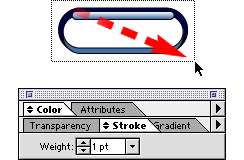
30. Now all the objects are the correct
size, position and color. Next we want to get rid of
the stroke in all of the objects. We can do it all in
one step.

31. Marquee-select all of the objects
and bring up the Strokes palette.
Click Here To
Continue...
|