|
|
A
Rainbow of Illustrator® 9 Gel Buttons
Part 2 |
 |
|
|
|
|
|
|
Creating Gel Button Rollover Images
46. To make images for the button rollover
states, you need to rasterize the vector objects. Be
sure not to rasterize the only copy you have. You want
to save the vector version to make more buttons. Make
a new Illustrator document as a working file for this
purpose. Select all the objects and copy them by clicking
Edit > Copy followed by File > New,
followed by Edit > Paste. The button will
appear in a new Illustrator document.

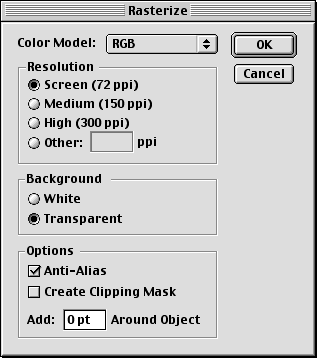
47. Next, click Object > Rasterize.
In the following dialog, give it a resolution of 72
ppi with a transparent background. We want the button
outline to have a smooth appearance so choose "Anti-Alias"
from the dialog Options. Click "OK" when done.
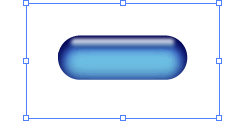
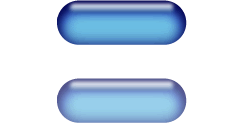
48. The rasterized button will appear
on the artboard similar to the example below.
49. While the button is still selected
drag a copy of it off the original by holding the Option
(Macintosh®) or Alt (Windows®) key while dragging.
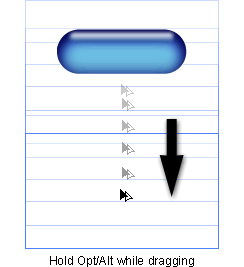
50. The copy of the button will appear
next to the original when you release the mouse button.
Bring up the Transparency palette and give it an opacity
of 70%.
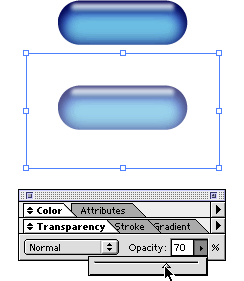
51. These images will be the button's
"normal" and "over" states. Click
here for a demo
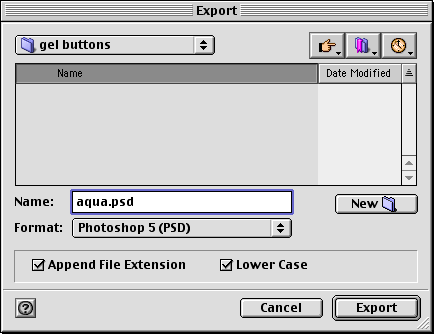
52. Next, save the file in one of the
bitmap formats. In this case we will choose the Photoshop®
(PSD) format. Click File > Export and you
will see the following dialog. Give the image a file
name and click "Export".
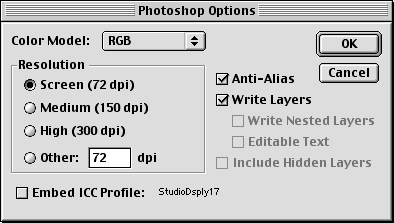
53. Illustrator will ask you how you want
to rasterize the file. Even though you've already rasterized
the vector objects, you will see this dialog. Choose
72 ppi for the resolution and click the "Anti-Alias"
check box and click "OK".
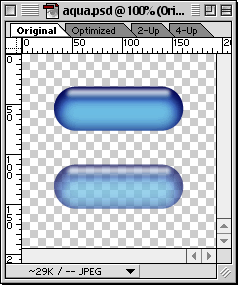
54. Below is a screen shot of the image
file opened in Adobe® ImageReady™. Although
it isn't necessary to use an image editor, you can nevertheless
manipulate the exported image outside of Illustrator.
Click
Here To Continue...
|