|
|
Canvas™
7 Aqua Button Tutorial
Part Two |
 |
|
|
|
|
|
|
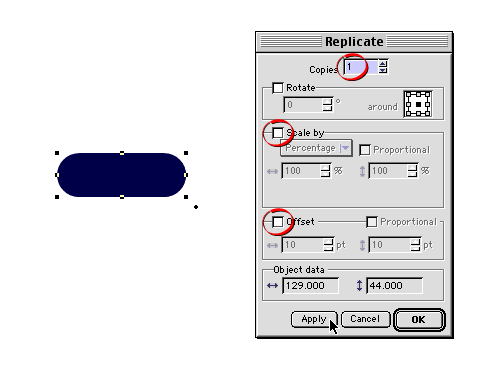
6. Next make a duplicate of the rectangle placing it
exactly on top of the original. One way to do this is
to click Edit > Replicate. In the dialog,
choose one copy with no offset or scaling (circled below).
Click "Apply" when done. The duplicate rectangle
will appear at the top of the stack so there won't be
any change in the appearance on the screen.
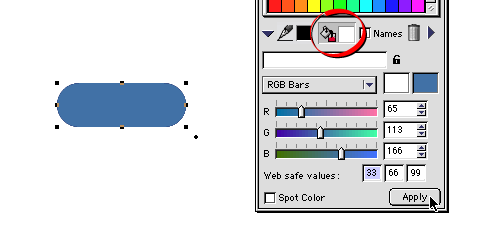
7. We need to make another new color ink for this rectangle.
In a manner similar to an earlier step, bring up the
Color manager in the Inks palette and enter 65, 113,
and 166 for the red, green and blue values as shown
below. Then, make sure the top rectangle is still selected
and depress the Fill icon (circled below) and click
the "Apply" button. The top rectangle should
look like the one below.
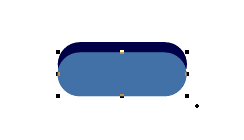
8. Make sure the document magnification is 100%, (actual
size), then press the "down" arrow 10 times
to move the top rectangle downwards 10 points.
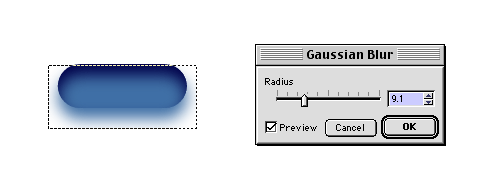
9. Click Object > SpriteEffects > Add Effect
> Blur > Gaussian Blur, and enter 9.1 pixels
in the dialog. If the "preview" checkbox is
checked, you will see a live preview while the dialog
is open. Click "OK" when done.
10. The two rectangles should appear similar to the
example below.

Click
Here To Continue...
|