|
|
Canvas™
7 Aqua Button Tutorial
Part Four |
 |
|
|
|
|
|
|
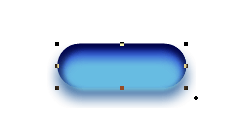
16. With the bottom rectangle selected, your screen
should look similar to the example below.
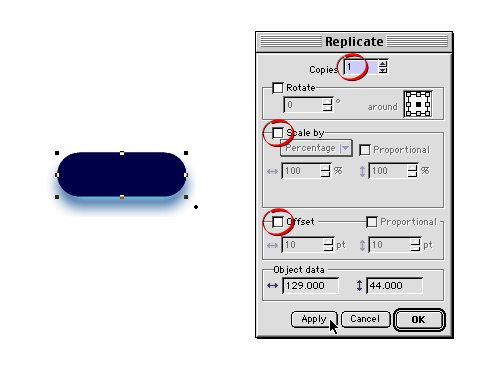
17. Make a duplicate of the rectangle placing it exactly
in the same position in the top of the stack. Click
Edit > Replicate similar to an earlier step.
In the dialog, choose one copy with no offset or scaling
(circled below). Click "Apply" when done.
The new rectangle will appear at the top of the stack.
This new rectangle will serve as the clipping path.
Note: By using Edit >
Replicate with no offset, you create a duplicate
rectangle at the top of the stack where it has to be
for it to function as a clipping path. Also, because
it is an exact duplicate in the exact same position
as the original, the clipping path will align perfectly.
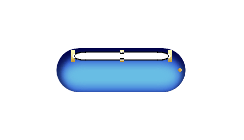
18. Using the Selection Tool, marquee-select all four
objects. Make sure to drag completely around
the SpriteEffects™ to select the rectangles to
which the effects are connected.
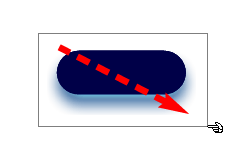
19. When all of the rectangles are selected, your screen
should look similar to the example below.
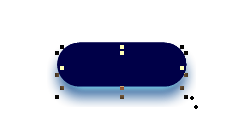
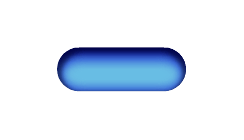
20. Click Object > Clipping Path > Make,
then click Object > Group. Sweet! The size
and positioning of the various rounded rectangles and
the blur distances selected in the Gaussian Blur dialogs
produce the 3D effect. If you are not satisfied with
your results, then adjust the settings until the clipped
group appears similar to the one below.
21. The last step is to create a highlight object.
Using the Rounded Rectangle tool, drag a slender rectangle
between the dark blue area at the top of the group and
the beginning of the bluish white area.
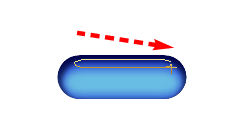
22. The following example should serve as a guide.
The fill color isn't important here, any color will
do.
Click
Here To Continue...
|