|
|
Avoiding
Font Substitution - Configuring Windows® XP
PostScript® Printer
|
 |
|
|
|
|
|
|
Configuring a PostScript Printer to Avoid Font Substitution - Windows XP
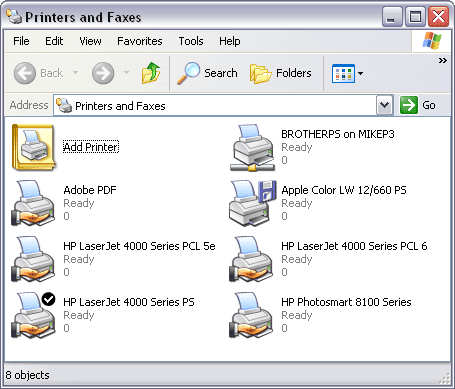
1. Start by opening your printers folder:
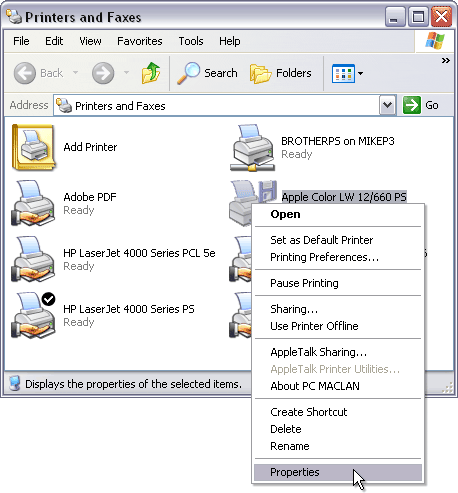
2. Right-click the printer you want to configure and choose "Properties" from
the context menu.
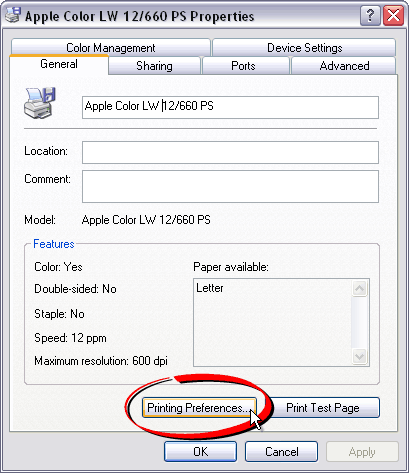
3. From the "General" tab, click the "Printing Preferences" button.
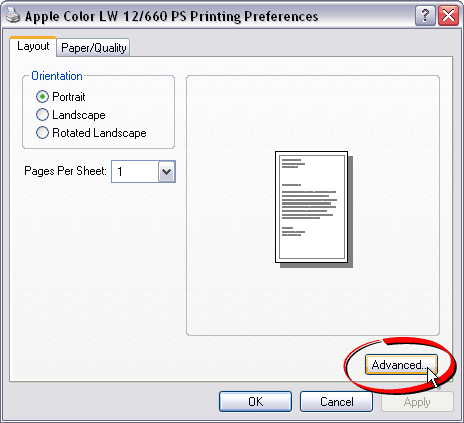
4. A Layout Options dialog will open. Click the "Advanced" button.
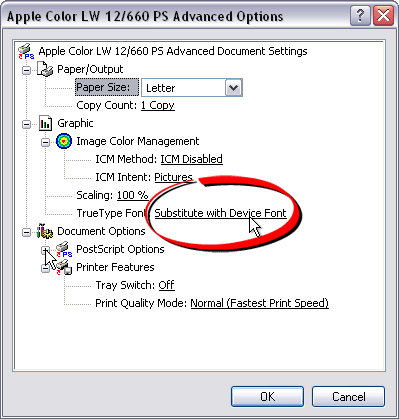
5. In the "Graphic" section of the Advanced Options dialog
there is a "TrueType Font" setting. The default setting is "Substitute
with Device Font". This is the setting we want to change so the
printer will use the installed TrueType fonts instead of the printer's
built-in device fonts. Click the "Substitute with Device Font" hyperlinked
text.
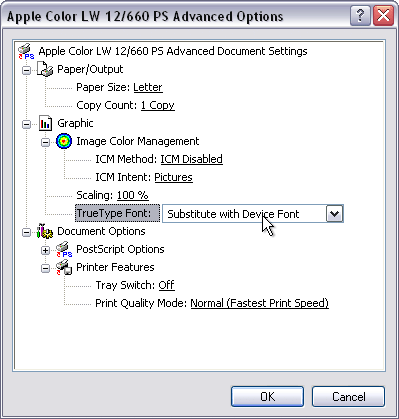
6. Clicking the "Substitute with Device Font" hyperlinked
text in the Graphic section of the Advanced Options dialog will display
a drop-down menu.
7. Choose "Download as Softfont" from this drop-down menu.
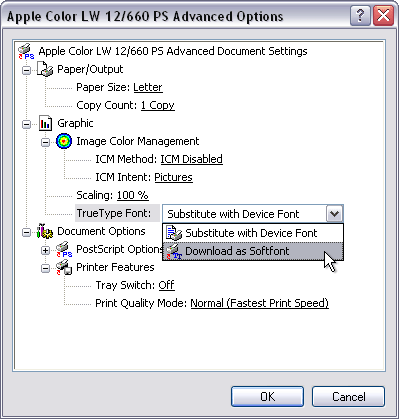
8. Choosing the "Download as Softfont" option will ensure
that trueType fonts are sent to the printer. That's it. You're done.
The printer is now configured to send TrueType fonts to the printer and
bypass the printer's font substitution table.

Note: The following steps are to demonstrate
how to edit the printer's font substitution table. These steps are
not necessary if you have done steps 1 - 8 above, but they are shown
here for instructional purposes only.
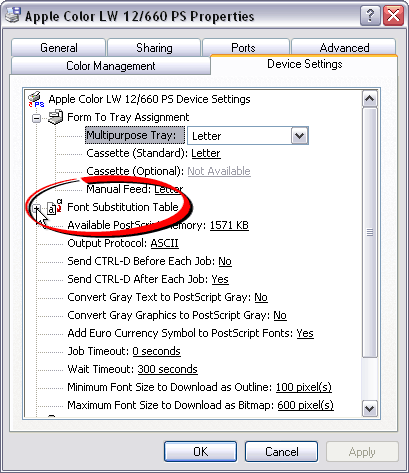
9. Click the "Device Settings" tab. Here is where you can
edit the printer's font substitution table. Click the plus sign to the
left of the "Font Substitution Table" section to expand it.
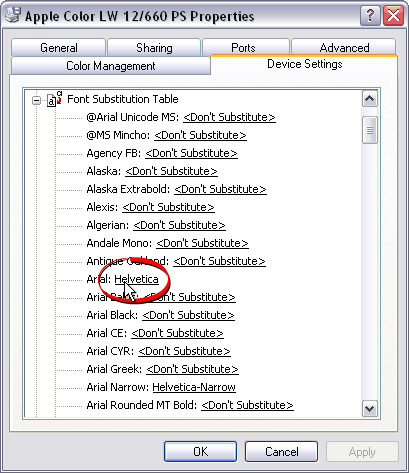
10. Scroll down to where you see a font that is being substituted for
one of the printer's built-in device fonts. In the screen shot below,
Arial is substituted with Helvetica. Click the "Helvetica" hyperlinked
text to change it.
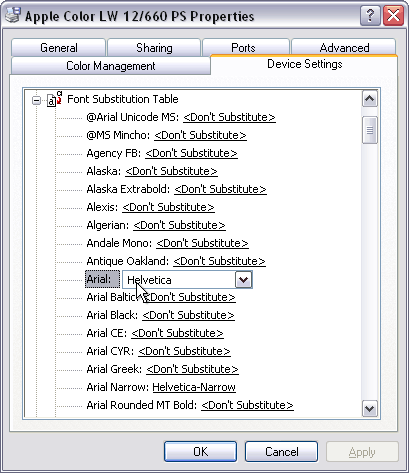
11. Clicking the "Helvetica" hyperlinked text will display
a drop-down menu.
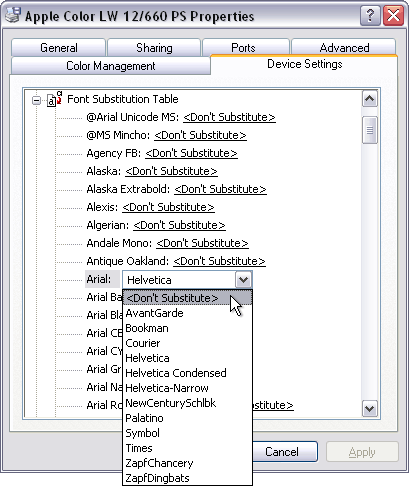
12. Choose "Don't Substitute" from the drop-down menu.
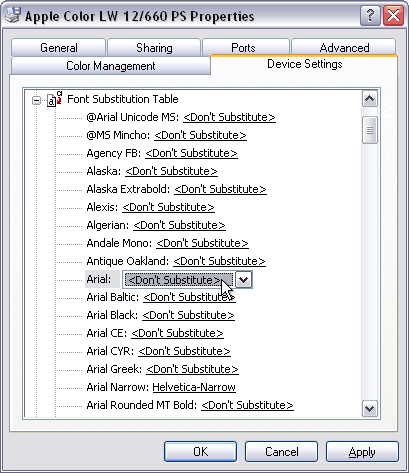
13. Setting each substituted font to "Don't Substitute" will
force the printer to use the actual TrueType font instead of one of the
printer's built-in device fonts. Editing the printer's font substitution
table is one way to accomplish this.
|