|
|
| |
|
|
 |
| |
| |
|
Intermediate |
|
| |
|
|
Creating
Setting Up QuarkXPress™ Tool Defaults - Part
One |
 |
|
|
|
|
|
|
Next we want to setup the tool defaults. Either double-click
the zoom tool or any item creation tool in the tool
palette or click Edit > Preferences > Document,
then click the "Tool" tab. We are going to
set the defaults for multiple tools at once.
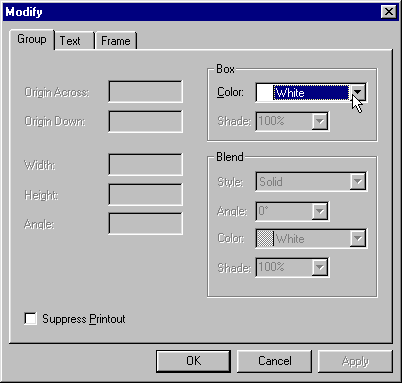
The objective here is to setup all text boxes with a
background of "None" (clear background) and
all picture boxes with a background of "White".
The reason for this is that TIFF images with white or
knocked-out backgrounds will not print correctly on
high-end imagesetters unless the background of the picture
box is either set to white or zero percent black (an
imperceptible percentage).
High-end imagesetters such as Linotronic®
have a hard time differentiating the edges of an image
from its plain white background if the picture box background
is set to "None". The outline of the pixels
in the image will come out ragged instead of smooth.
If the box contains an EPS image with a clipping path,
then set the background to "None" for that
image. If you modify the "Clip Path" item
settings for a picture box and either select an embedded
clipping path or let Quark™ create one then Quark
will automatically reset the background to "None"
for that box since images with clipping paths require
a clear background.
I use these settings because the backgrounds of most
printed pages are white. I always use "Send to
Back" to place picture boxes with white backgrounds
underneath text boxes. I make the text boxes clear and
place them on top of picture boxes in the item stacking
order. Usually, the only time I place a picture box
over text is when it is an EPS file with a clipping
path and a background of "None".
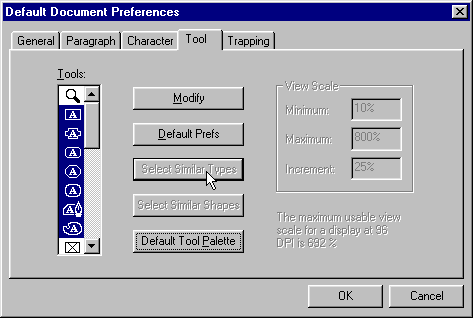
First modify the text tools. Start by clicking the first
text box creation tool. Then select the remaining text
box tools.
1. You select multiple tools either by:
a.) Holding down the Ctrl key (Windows®)
or Command key (Mac®) and
select them one at a time, or
b.) Selecting the first one in a range and click the
Shift key on the last one in a range, or
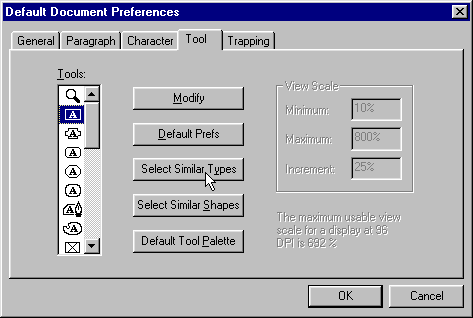
c.) Selecting one of the text box tools, then click
the "Select Similar Types" button (shown below).
2. Next click the "Modify" button.

3. In the "Group" tab of the "Modify"
dialog, select a box color of "None".

4. In a similar manner,
select all the picture box tools and press the "Modify"
button.
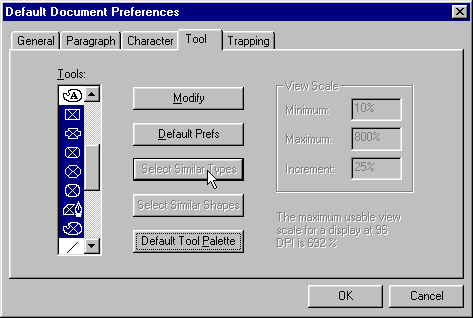
5. In the "Group" tab of the "Modify"
dialog, select a box color of "White".
Click
Here To Continue...
|
|
|
|
|
| |
Previous
Home
Contact Mike
Related Sites
Next
Copyright
© 1998-2016 Mike Doughty, All Rights Reserved Legal
Notices
Page Last Revised: October 26, 2016
Privacy Policy
|
|
|
|
|
|
|
|