|
|
Vectorize
a Logo From an Image |
 |
|
|
|
|
|
|
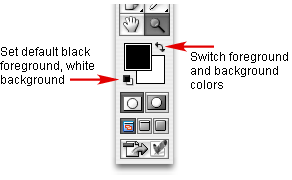
5. Next, if the default foreground and background
colors are not black and white, click the small black
and white icon to the lower left of the color icons
at the bottom of the Toolbox.
6. Next, switch the foreground and background colors
in the Toolbox by clicking the little arrows in the
upper right corner of the the color icons at the
bottom of the Toolbox. This will change the foreground
color to white so when we use our painting tools,
we will be working with white.
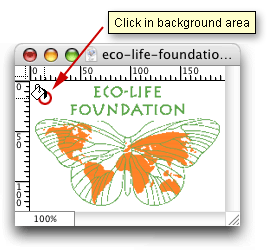
7. Next, select the Paint Bucket Tool and make sure
the new layer is selected and click anywhere in the
document window. This will flood-fill the layer and
give the image a white background. Now it is easier
to see the detail of the artwork.
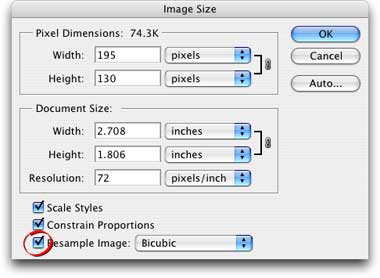
8. Next we need to upsample the image so we have more
pixels to work with. Click Image > Image Size.
In the Image Size dialog please note that this image
has a resolution of 72 PPI (pixels per inch). Put
a check mark in the "Resample Image" checkbox.
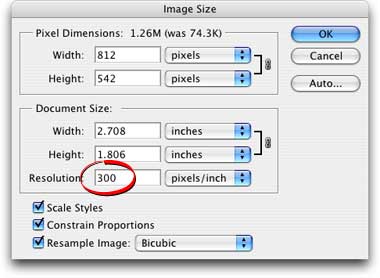
9. Then enter 300 in the Resolution text box. Please
note that the number of pixels in the Width and Height
boxes now increase to accommodate the new image size.
Click "OK" when done.
At this point it would be wise to save the file. Click File > Save
As and choose a file name. In this example, I
called the file "logo rgb 300.psd".
Click
Here To Continue...
|