Web Design   Web Hosting   Photoshop Tutorials   Free Fonts   Drawing Basics  
 
Photoshop Tutorials - Free Fonts
[Home]
[Sitemap]
[Blog]
[Read Me First!]
[Photoshop Tutorials]
[Canvas Tutorials]
[Corel Tutorials]
[Quark Tutorials]
[Illustrator Tutorials]
[FreeHand Tutorials]
[Drawing Basics]
[Porting Files]
[Free Fonts]
[Font Tutorials]
[Misc Tutorials]
[Animation]
[About Mike]
[Gallery]
[Related Sites]

 
    Intermediate  
 
  Canvas 6™ Technical Manual Project
Part 3L - Build The Document

Return To Technical Manual Project Index

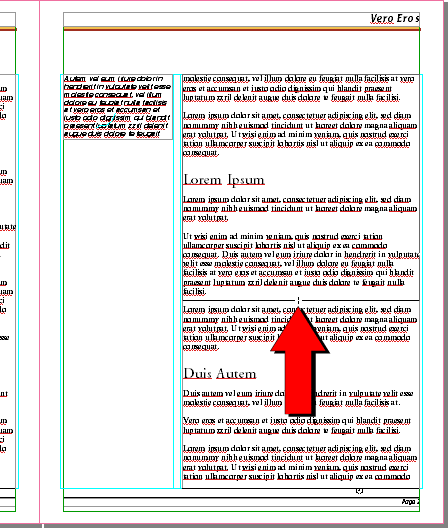
83. Using the Selection tool selecttool.gif drag the bottom handle of the right hand text object upwards to the break separating the paragraphs shown. Note that measurements are not important here. This should be done by eye.

cnvtech145.gif

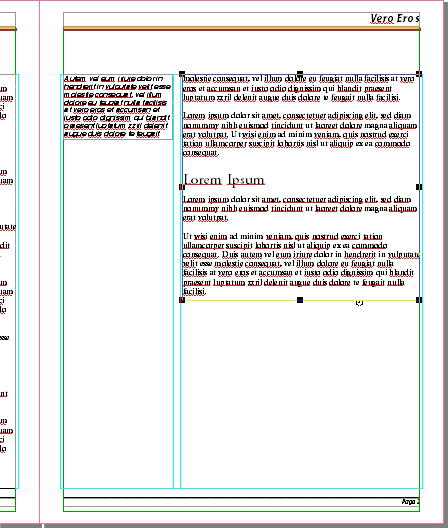
84. Canvas will re-flow the overset text to the subsequent page.

cnvtech146.gif

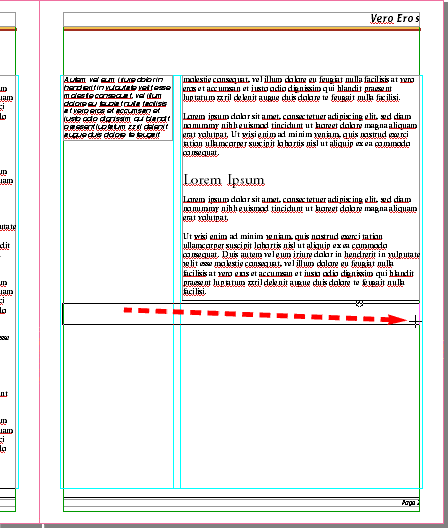
85. Using the Rectangle tool cnvrecttool.gif drag a new rectangle approximately in the location shown below. Make sure it snaps to the left and right margins.

cnvtech147.gif

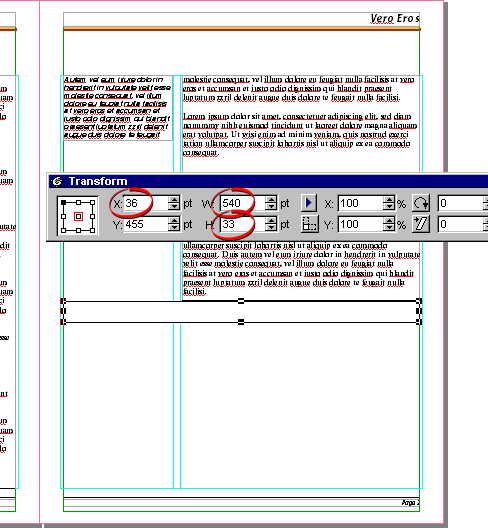
86. Bring up the Transform palette to check the x-coordinate (36) and the width (540) and the height (33). You can adjust the y-coordinate of the rectangle by dragging it upwards or downwards until its position appeals to you.

cnvtech148.gif

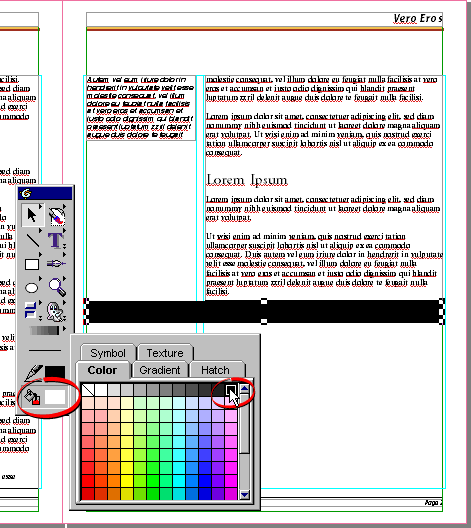
87. Click the Fill Ink icon in the Toolbox (or bring up the Inks palette) and in the Color tab click the black ink tile to apply a black fill to the rectangle.

cnvtech149.gif


Click Here To Continue...


Previous   Home    Contact Mike   Related Sites    Next

Copyright © 1998-2016 Mike Doughty, All Rights Reserved Legal Notices
Page Last Revised: October 26, 2016
Privacy Policy