|
|
Coffee
Cup Animation Part Two
Creating The Frame Images Continued |
 |
|
|
|
|
|
|
8. Click the "To Back" button on the toolbar
to send it to the back of the stack, then click a color
button to give it a fill. In this case I used 20% black
for the fill.
 |
|
Tip: If you want a transparent
background for the finished animation, then set
the background color to be the same as the background
color over which it will be displayed. Then export
each frame as a GIF image and select "Anti-aliasing"
in the Bitmap Export dialog. You will see another
dialog where you can set the background color to
be transparent. This will provide a matte color
which will blend the anti-aliased pixels into the
background perfectly. |
9. Your workspace should look something like the one
below.
10. You are now ready to export the first frame image.
Using the Pick Tool, marquee-select the frame.
11. With the first frame selected, your workspace should
look something like the one below.
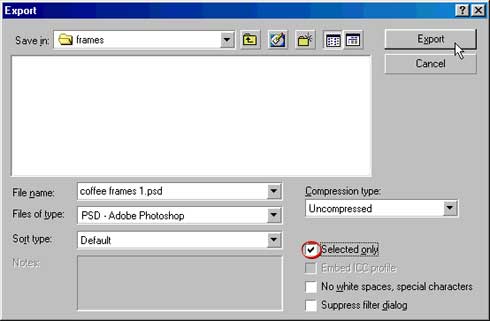
12. Next, click File > Export... to export
the frame as an image.
13. In the Export dialog, choose the "Selected
Only" check box. This will export only the selected
objects as an image. Use a True Color file format. In
this case I am using the Photoshop PSD file format.
Give it a filename and click "Export". Save
all the frame images in the same folder.
|
|
Tip: Name the sequence
of frame images with the same file name ending with
1, 2, 3, etc. Many animation programs recognize
files named this way as an image sequence. You can
take advantage of this and load the whole frame
sequence at once. |
| |
|
|
 |
|
Note:
You don't have to save images in Photoshop format.
This format is just my personal preference. You
can choose any of the other true color raster formats
such as TIFF or PICT or BMP. Just don't use a lossy
format such as JPEG or a format that isn't true
color like GIF (more
here on color depth and true color). The reason
is that when the finished animated GIF is created
the color depth will be reduced to a maximum of
256 colors. You don't want to start with a limited
palette. Rather, you want all the colors available
before the GIF animation is generated. |
Click
Here To Continue...
|