|
|
Cool
Traveling Lens Effect In Canvas™ 7
Part Four |
 |
|
|
|
|
|
|
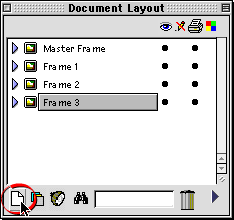
21. In the Document Layout palette, add
another frame by clicking the icon in the lower left
corner.
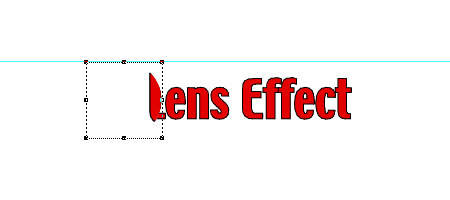
22. Again, click Edit > Paste
to paste another copy of the lens object, then drag
it until the top edge snaps to the guide as in a previous
step. Using the Object Specs Palette, enter "180"
for the left coordinate. You now have completed three
of the frame images.
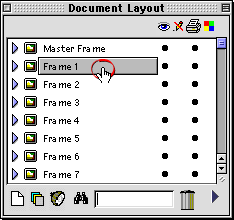
23. Repeat the previous steps for the
remaining frames in the animation shifting the lens
object 10 points to the right in each new frame. Continue
this process until the lens has passed completely across
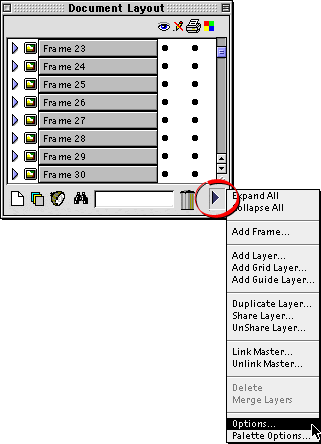
the text to the right. When you have made all the frames
select Frame 1 in the Document Layout palette.
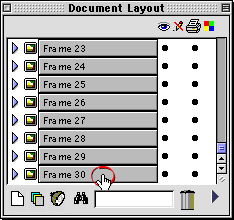
24. You can select all the frames at once
by scrolling to the bottom of the palette and clicking
on the last frame while holding down the Shift key.
In this case we are going to adjust the timing of the
frames so they all have the same value.
25. Click the small triangle in the lower
right corner of the palette (circled below). Choose
"Options" from the menu to access the Options
dialog.
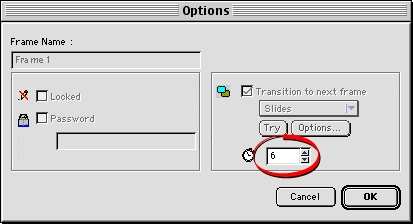
26. Enter a "6" in the frame
delay box (circled below). This will set the timing
of each frame to 6/100ths of a second (about 15 frames
per second). Click "OK" when done.
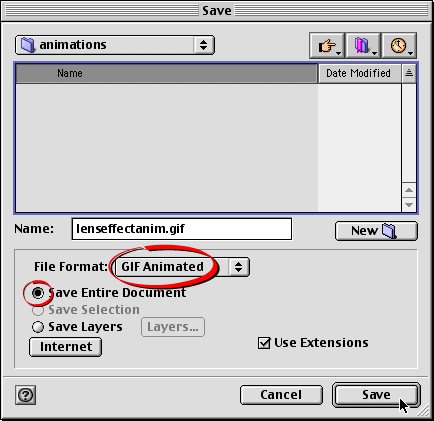
27. Click File > Save to save
the Canvas animation. Then click File > Save As...
and choose "GIF Animated" from the File Format
drop-down and choose the "Save Entire Document"
radio button. Click "Save" when done. This
will generate the finished animated GIF file.
Click
Here To Continue...
|