This third tutorial on the subject of Photoshop®
textures shows how to take advantage of the Texturizer
Filter by "cloning" the texture qualities
from one image and applying them to another.
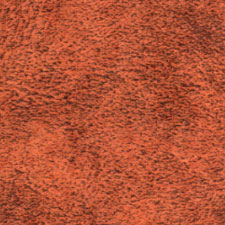
1. The image on the left below was scanned into the
computer as an RGB image. The scan was made of a common
stationery "accordion file" which was selected
because of the simulated leather pattern printed on
it. When choosing images for textures, pick ones with
a broad enough range of grayscale pixel values. This
will give your textures depth and dimension.
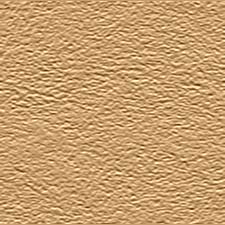
2. The image on the right below is was created by saving
the scanned image as a new Photoshop .PSD file then
converting it into a grayscale image with the command:
Image > Mode > Grayscale
It is not necessary that the image be saved in grayscale
mode. But since Photoshop only uses the grayscale information
in the image, it uses less disk space than a color image.
You may want to do this tutorial on your own computer
and use this image in your own texture library. If you
are using Netscape® or Internet Explorer, simply
right click on the grayscale image below and save it
to disk. Then open the image in Photoshop and save it
as a Photoshop .PSD file.
The new file can be stored in the same folder with other
Photoshop texture files (described in a previous texture
tutorial). It is this file you will be loading and applying
to images with the Texturizer Filter.
Original Scanned Image:
Grayscale Image of Original Scan:
3. Once you have saved the texture file as a grayscale
Photoshop .PSD file you are ready to apply the texture
to an image. Make a new RGB image at 72 pixels per inch.
The image below is 256 pixels square. Click the foreground
color square in the color palette and set the color
values to R=199, G=159 and B=109 (it is one of the colors
on the default swatches palette in Photoshop). Next
click the bucket tool and flood fill the image with
the foreground color.
4. Now comes the real magic. Issue the command:
Filter > Texture > Texturizer > Load Texture
Then load the .PSD file saved in step 2 above. In
this example set Scaling=100, Relief=10 and the Light
Direction=Top. Click "OK" to close the dialog
and apply the texture to the image.
5. The result is a dazzling effect on a mono-colored
tile that can now be used as a background or fill. You
can apply this texture to any image, not just to background
tiles or fills.