| |
|
|
Tiling
Textures and Fills - Part One |
 |
|
|
|
|
|
|
Giving a Texture or Fill a Uniform
Appearance
Tiles are used as background images on web pages. Tiles
are also used as wallpaper in Microsoft®
Windows®. Pattern Fills are
used in Photoshop® image editing
as a means to fill an area in an image. The following
guidelines should be followed in order to achieve a
good result.
When making background tiles or fills, care should be
taken so that...
A. The overall appearance is uniform when the image
used as a background tile or fill, and...
B. The edges of the tiles mate seamlessly together.
This tutorial covers one way to achieve A above. The
next tutorial addresses B.
Making a background tile using the sandstone texture
(applied with the Texturizer Filter) is very popular
and is a good example of the use of this technique.
1. Start by making a 4" x 4" RGB image at
72 pixels per inch with a white background. Save the
file as TILE01.PSD or other name. Pick a color from
the swatches palette that appeals to you and set it
as the foreground color. By moving the mouse over the
swatches, the cursor turns into an eyedropper. Simply
clicking the mouse on any color swatch will set the
foreground color to the one you pick.
2. Next use the bucket tool and click anywhere in the
image area to flood fill it with the foreground color
you selected
3. Next apply the sandstone filter to the image with
the command:
Filter > Texture > Texturizer > Sandstone
In this example set Scaling=100, Relief=4 and the Light
Direction=Top. Click "OK" to close the dialog
and apply the texture to the image.
 |
 |
4. Make a new 4" x 4" RGB image at 72 pixels
per inch with a white background. This image will only
be used to test the tiling of a selected portion of
the first image. It will not be saved.
 |
 |
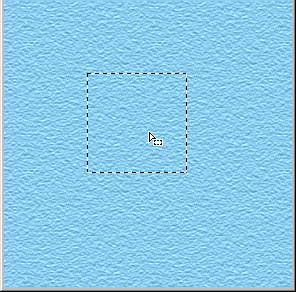
5. Click the rectangular selection tool. In the Marquee
Options palette select Style=Fixed Size, Width=100 pixels,
Height=100 pixels and Feather=0 pixels.
6. Click anywhere in the image area. A 100 x 100 pixel
selection marquee will appear. You will be selecting
an area that will serve as a pattern that fills the
second image. Since the defined pattern will simply
be a tile, the trick of this technique is to select
as uniform an area as possible. The goal is twofold:
a) The defined area should be as uniform as possible
without any distracting flaws or unusual patterns that
will repeat throughout the fill.
b) The outer edges of the defined area should mate smoothly
together when they are tiled, although this is not as
important as a) above because the next tutorial will
explain how to overcome this.
7. Using any selection tool, click inside the selection
and while pressing the mouse button, drag the marquee
to a suitable location
|
 |
Once you have selected the area to define as a pattern,
click:
Edit > Define Pattern
8. Next make sure the test image is the active window
then click:
Edit > Fill
You will see the following dialog. Select:
Contents:
Use=Pattern
Blending:
Opacity=100%,
Mode=Normal.
Then click "OK" to apply the pattern fill
to the image.
9. Now check the results of the pattern fill on the
image. Look for smears, ridges, or any uneven repeating
texture picked up from the pattern definition in step
7 above. If you see any undesirable repeating pattern,
simply drag the selection marquee to a new location
in the TILE01.PSD file and repeat the command:
Edit > Define Pattern
Repeat steps 7 and 8 as necessary until the image
is filled with a smooth, even texture.
10. Once you are satisfied with the results make the TILE01.PSD
the active window and click:
Image > Crop
This will crop the image down to a 100 x 100 pixel tile.
11. Below is the finished tile. You can use it for your
own backgrounds. If you are using Netscape®
or Internet Explorer, simply right click on the image
below and save it to disk.
Click
Here To Continue... |
|