|
|
Understanding
The TransType Interface
Part Four |
 |
|
|
|
|
|
|
To find out more about TransType and where
to get it, click
here
11. You also can
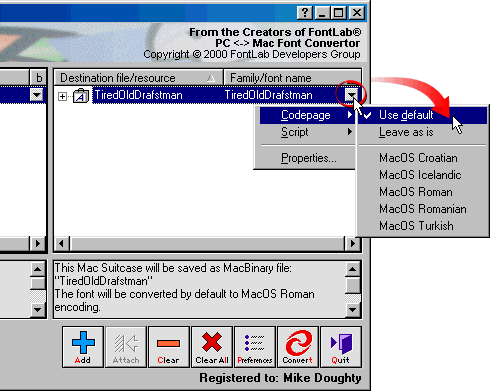
select the encoding of the destination font. Click the
drop-down arrow to the right of the destination font
to adjust its encoding. This is another important point
to remember when porting fonts across platforms as mentioned
here.

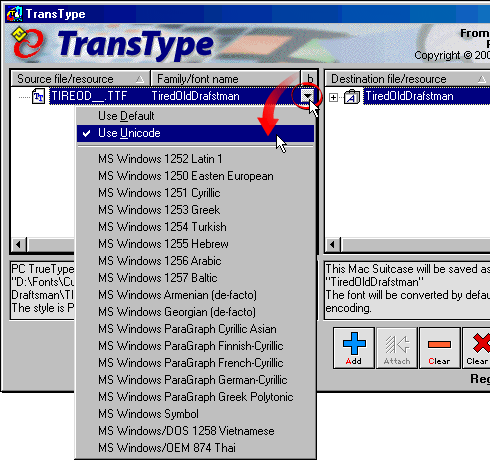
12. You can also select the source encoding
by clicking the drop-down arrow to the right of the
font in the source list.

Type 1 Font
Metrics
When converting Type 1 fonts, the metrics
information (e.g. kerning, spacing, ascent, descent)
is not in the same file as the outlines. On the PC,
the font metrics are contained in the PFM file (more
here). TransType will automatically include the
font metrics if the the PFM file is located in the same
folder as the PFB file or in a subfolder named "pfm".
On the Mac®,
the font metrics are located in the suitcase containing
the screen font (more
here). You can convert a Type 1 font by dragging
and dropping either the suitcase (containing the screen
font) or the printer font. But, if you convert the printer
font, the metrics won't be included. Thus, when converting
Mac Type 1 fonts, drag and drop the suitcase into the
TransType window. This is one of the important points
about converting fonts (more
here).
Click
Here To Continue...
|